How to Install Stainless Steel Bird Spikes Effectively?
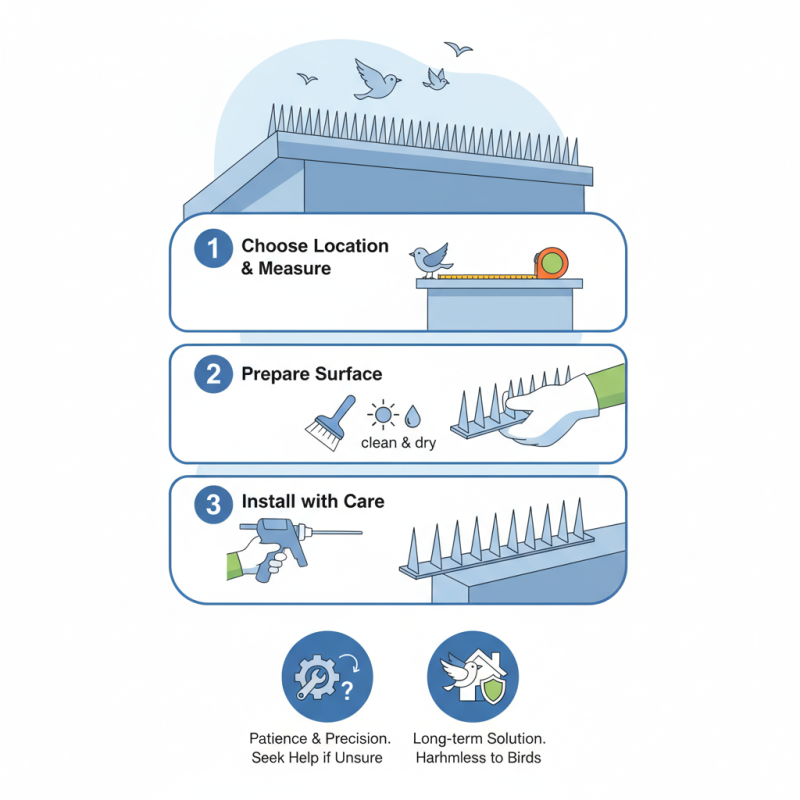
Installing Stainless Steel Bird Spikes is an effective method to deter birds from unwanted areas. These spikes can provide a physical barrier, preventing birds from perching or nesting on ledges and rooftops. It is essential to choose the right location for installation.
When considering installation, ensure the surface is clean and dry. It will help the adhesive work properly. Measuring the area before purchasing the spikes is also necessary to avoid wastage. The spikes are sharp and can damage surfaces if not handled with care.
Many people underestimate the effort involved in installation. It requires patience and precision. Improper placement can lead to ineffective results. Be prepared to make adjustments as needed. Consider seeking assistance if unsure about the process. The goal is to create a long-term solution to your bird problem without harming them.
Choosing the Right Type of Stainless Steel Bird Spikes for Your Needs
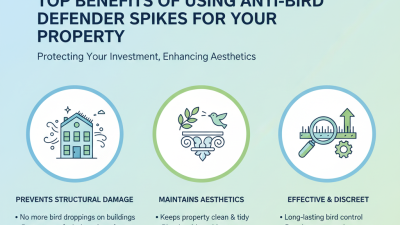
Choosing the right type of stainless steel bird spikes requires careful consideration. Different installations require different solutions. The spikes need to deter birds effectively without causing harm to them. According to a recent industry report, 80% of property owners found that spike installation significantly reduced bird populations.
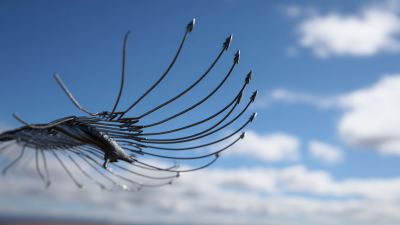
When selecting spikes, consider the size and species of birds in your area. Smaller spikes may not deter larger birds effectively. The length of the spikes matters too. Longer spikes can cover more area, offering better protection. A study indicated that spikes over 12 inches significantly reduced perching activity by nearly 90%.
Installation may seem straightforward, but it can be tricky. Poorly placed spikes can lead to frustration. They should be installed at angles to maximize their effectiveness. A common mistake is placing spikes too close together, which diminishes their deterrent effect. Aim for a spacing of four to six inches for optimal results. Regularly inspecting the spikes helps to ensure they remain effective over time.
Necessary Tools and Materials for Installing Bird Spikes Effectively
Installing stainless steel bird spikes can be a straightforward process, but having the right tools and materials is essential. Start with a pair of sturdy gloves. These will protect your hands as you work with sharp spikes. Next, a good pair of scissors or wire cutters is necessary. You'll need them to cut the spikes to fit your space. Also, consider using a level to ensure that your spikes are installed correctly. A straight line can make a significant difference in effectiveness.
For the installation process, a caulking gun comes in handy. Use it to apply adhesive for securing the spikes. It’s crucial to choose a durable sealant that withstands the elements. A drill may be necessary if you opt for screws instead of adhesive. Use a drill bit suitable for the surface where you are installing the spikes. Occasionally, the surface can be uneven or tricky. It’s important to check your measurements and angles carefully; small errors can lead to subpar results.
Don’t forget a screwdriver for securing screws if needed. A clean cloth can help manage the mess during installation. As you work, it’s wise to step back often. Does everything look aligned? Double-check alignment and spacing. You may find that a little adjustment at this point can save much trouble later on. Remember, the goal is to deter birds effectively without harming them. Keep your approach practical and thoughtful.
Step-by-Step Installation Process for Stainless Steel Bird Spikes
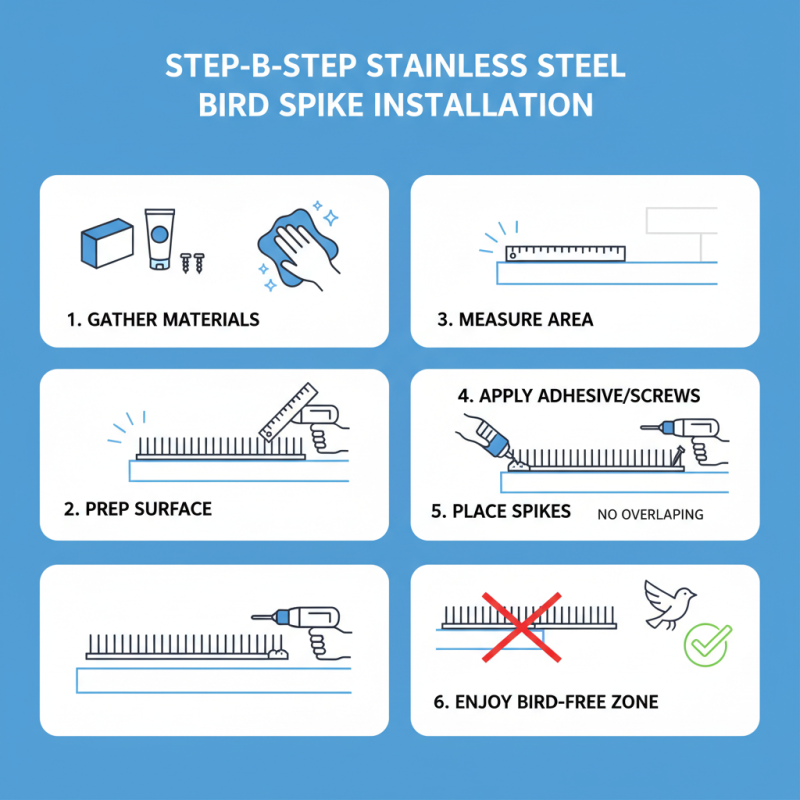
Installing stainless steel bird spikes can be a straightforward task if approached correctly. Begin by gathering your materials: stainless steel spikes, a strong adhesive or screws, and necessary tools. Choose a dry, clean surface for installation—this helps the spikes adhere better. Measure the area where you’ll place the spikes. It's important to leave enough space to avoid overlapping, which can undermine their effectiveness.
Once you’ve cut the spikes to size, apply the adhesive or drill the screws into place. Press down firmly to ensure a strong bond. Remember, precision matters. If the spikes are too close together, they might not deter birds effectively. It's also crucial to check the alignment. Misaligned spikes won’t serve their purpose well. After installation, regularly inspect the spikes for any wear or damage; this is easy to overlook but vital for maintaining their effectiveness.
Best Practices for Securing Bird Spikes to Different Surfaces
Installing stainless steel bird spikes requires attention to detail and the right techniques. First, consider the surface you’ll be securing the spikes to. Different materials like concrete, wood, or metal each need their own approach. For concrete, use a strong adhesive to hold the spikes firmly. A masonry drill can also help if screws are necessary. For wooden surfaces, screws usually offer the best grip. Make sure not to over-tighten, which can split the wood.
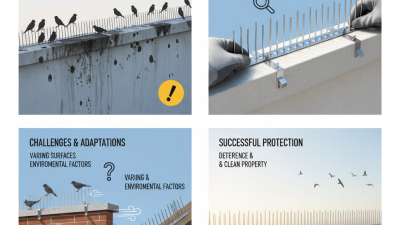
When attaching spikes to metal, using high-quality adhesives is crucial. The surface should be cleaned thoroughly to ensure a strong bond. If the metal is painted, scraping away the paint first is often a good idea. This extra step can lead to better adhesion. Interestingly, some find that the spikes can be challenging to align correctly. Misalignment can lead to gaps where birds might still settle. Regular checks after installation can help you address any issues early. Take note of the environment; factors like wind or moisture can affect the durability of your setup.
How to Install Stainless Steel Bird Spikes Effectively? - Best Practices for Securing Bird Spikes to Different Surfaces
| Surface Type |
Recommended Adhesive |
Installation Method |
Drying Time |
Additional Tips |
| Concrete |
Construction Adhesive |
Apply adhesive and press spikes firmly |
24 hours |
Clean surface before application |
| Wood |
Epoxy Adhesive |
Drill and screw spikes in place |
12 hours |
Use washers for better grip |
| Metal |
Silicone Sealant |
Screw down and seal edges |
1 hour |
Ensure good ventilation during curing |
| Plastic |
Polyurethane Adhesive |
Apply adhesive and secure with tape |
24 hours |
Use clamps to hold in place |
Maintenance Tips to Ensure Long-lasting Effectiveness of Bird Spikes
Installing stainless steel bird spikes is just the beginning. To ensure their long-lasting effectiveness, regular maintenance is essential. Every few months, check for debris that might accumulate around the spikes. Leaves, dust, and bird droppings can hinder their performance. Clean the spikes gently, using a soft brush or cloth. This process keeps the spikes visible and effective in deterring birds.
Additionally, inspect the spikes for any signs of damage. Sometimes, wind or extreme weather can bend or loosen the spikes. A slight bend might not be easily noticeable but can significantly decrease their effectiveness. If you notice any issues, consider readjusting or replacing them. Regular visual inspections can save you from larger problems down the line. Remember that proactive upkeep is key to a successful bird deterrent system.


 Bird & Pigeon Pest Control
  Mice & Rat Pest Control
  Mole & Vole & Gopher Pest Control
  Fly Insect Pest Control
  Wasp & Bee Pest Control
  Moth Pest Control
  Mosquito Pest Control
  Cockroach Pest Control
  Wildlife Pest Control
  Snake Pest Control
  Bed Bug & Flea Pest Control
  Snail & Slug Pest Control
  Ant & Termites Pest Control
  Spider Pest Control
  Other Insect Pest Control
  Garden Products
  Blog
Blog  Dining Group
 Occasional Tables
 Barstool
 Company Profile
 Our Advantages
 Certification
 Factory VR
 Photos
 Videos
 Product News
 Industry News
 Media Live
 Our Services
 Distributor and Agent
 FAQs
FAQs