How to Install Anti Bird Spikes for Effective Bird Control?
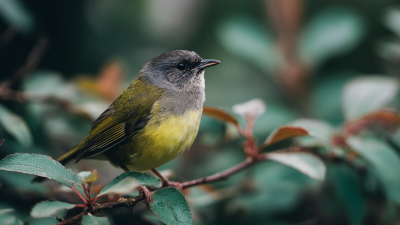
Bird control challenges are widespread, impacting urban and rural areas alike. One effective solution is the use of Anti Bird Spikes. According to a report by the Bird Control Institute, over 70% of property owners face issues with birds nesting or roosting in unwanted spaces. These spikes serve as a physical barrier, preventing birds from landing and causing damage.
Dr. Emily Carter, a renowned expert in pest management, states, "Anti Bird Spikes are vital in urban environments to protect buildings and avocado crops." Her research highlights the importance of proper installation to maximize their effectiveness. However, many still question the installation process and whether they truly work.
Not all situations are ideal for Anti Bird Spikes. Challenges can arise if the spikes are not placed accurately or if the areas are particularly hard to access. This raises the need for thoughtful planning. Proper preparation and consideration are essential to ensure these spikes serve their purpose effectively.

Understanding the Purpose of Anti-Bird Spikes in Bird Control
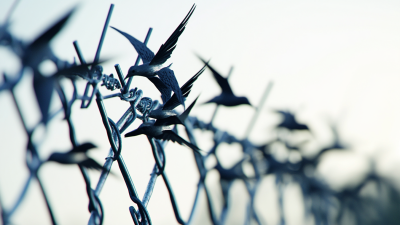
Anti-bird spikes serve a crucial role in controlling unwanted bird populations. Their primary function is to prevent birds from perching or nesting in specific areas. When birds are unable to settle on ledges or rooftops, it significantly reduces issues like droppings and noise complaints. According to a report by the National Pest Management Association, bird droppings can cause damage to buildings and vehicles, costing property owners thousands in repairs.
Implementing anti-bird spikes can also enhance the aesthetic value of a space. Unsightly nests and messes often lead to unappealing environments, making it essential to consider this solution. Interestingly, some studies suggest that just 40% of building owners utilize bird control methods effectively. Many fear that spikes may harm birds, but data shows they primarily deter rather than injure.
Installation can be tricky and requires careful planning. Proper placement ensures effectiveness, yet many fail to install them at the right angles. Without proper installation, the spikes may become ineffective sooner than expected. Evaluating your specific area and bird behavior is key. It remains essential to choose the right approach for each unique setting.
Choosing the Right Type of Anti-Bird Spikes for Your Needs
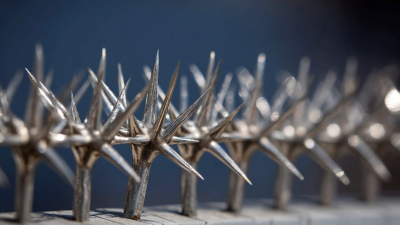
When selecting anti-bird spikes, consider the specific needs of your location. Different types serve various environments. For instance, plastic spikes work well on rooftops. They are lightweight and resistant to weather conditions. In contrast, metal spikes offer durability and can withstand harsher environments. They might be more visible, which can deter some bird species.
You should also think about the birds you want to control. Pigeons and seagulls are larger and may require sturdier options. Smaller spikes could be ineffective against these birds. Additionally, pay attention to the spacing of the spikes. If they are too far apart, birds might still find a way to perch. A well-planned arrangement maximizes effectiveness.
Lastly, aesthetics cannot be overlooked. You don't want your property to look cluttered. Consider how the spikes blend with the structure. It might require extra thought and creativity to find a solution that works. Getting feedback from others can help you see things in a new light. Reflect on your choices and how they affect the overall appearance of your home.
How to Install Anti Bird Spikes for Effective Bird Control? - Choosing the Right Type of Anti-Bird Spikes for Your Needs
| Type of Anti-Bird Spike |
Material |
Length (inches) |
Effective Against |
Installation Method |
| Stainless Steel Spikes |
Stainless Steel |
10 |
Pigeons, Seagulls |
Glue or Screws |
| Plastic Spikes |
Plastic |
8 |
Smaller Birds, Sparrows |
Nails or Adhesive |
| Polycarbonate Spikes |
Polycarbonate |
12 |
All Birds |
Adhesive or Clips |
| Stainless Steel Needle Spikes |
Stainless Steel |
15 |
Large Birds, Crows |
Screws |
| Wire Spikes |
Metal Wire |
6 |
Nesting Birds |
Tie or Adhesive |
Preparing the Installation Area for Anti-Bird Spikes
Preparing the installation area for anti-bird spikes is a crucial step in effective bird control.
Cleanliness is key; ensure the surface is clear of debris, nests, and droppings. According to a study by the National Pest Management Association,
30% of bird-related problems stem from poor maintenance.
A dirty installation site can hinder the spikes’ effectiveness.
Measure the area accurately. Misplaced spikes can lead to gaps where birds might enter.
A reliable method is to use a chalk line for precise alignment. Remember, the recommended spacing for spikes is about
one spike every 10 to 12 inches. This spacing ensures full coverage without overextending the material’s reach.
Be cautious during installation. Improper placement may lead to bird adaptation, making your efforts futile.
A well-prepared area increases the longevity of the anti-bird spikes. Birds can be persistent. They will find ways to bypass poorly installed barriers.
Regular maintenance checks after installation are also essential. You may need to adjust or replace spikes over time.
Step-by-Step Guide to Installing Anti-Bird Spikes
Installing anti-bird spikes can significantly reduce bird activity around your property. Start by selecting the right spikes for the area you want to cover. Consider factors like bird size and location. Gather essential tools, including gloves, a ladder, and adhesive or screws for mounting.
Clean the installation surface thoroughly. This step is crucial. Dust and debris can hinder adhesion. Position the spikes carefully to cover all potential perching spots. Leave no gaps, especially in corners. Test the stability after setting them in place. A slight movement can indicate poor installation.
Applying spikes can be straightforward, yet it requires attention to detail. Misalignment might occur if you rush the process. Patience is key. Each section should securely attach to withstand wind and weather. If your spikes don’t seem effective at first, reassess your installation points. Small adjustments may lead to better results later on.
Maintaining and Inspecting Your Anti-Bird Spikes After Installation
Maintaining and inspecting your anti-bird spikes after installation is crucial for long-term effectiveness. Start by checking the spikes regularly for any signs of wear or damage. Birds can sometimes dislodge the spikes, especially in harsh weather. If you notice any spikes missing or bent, replace them promptly to ensure they remain effective.
Tips: Use a soft brush to remove debris. Remove any dirt or leaves that may accumulate on the spikes. This ensures that the spikes stay visible and effective.
Sometimes, birds can adapt and find ways to perch nearby. Inspect the surrounding areas as well. Look for overhanging branches that might provide access to the spikes. Consider trimming any foliage that offers a landing spot. Keeping the area clear helps maintain a bird-free environment.
Remember, not all installations are perfect. If you continue to see a bird presence, it may be time to rethink your strategy. Ensure that the spikes are installed at the correct angle and height for optimal protection. Regular adjustments might be necessary to enhance their effectiveness.


 Bird & Pigeon Pest Control
  Mice & Rat Pest Control
  Mole & Vole & Gopher Pest Control
  Fly Insect Pest Control
  Wasp & Bee Pest Control
  Moth Pest Control
  Mosquito Pest Control
  Cockroach Pest Control
  Wildlife Pest Control
  Snake Pest Control
  Bed Bug & Flea Pest Control
  Snail & Slug Pest Control
  Ant & Termites Pest Control
  Spider Pest Control
  Other Insect Pest Control
  Garden Products
  Blog
Blog  Dining Group
 Occasional Tables
 Barstool
 Company Profile
 Our Advantages
 Certification
 Factory VR
 Photos
 Videos
 Product News
 Industry News
 Media Live
 Our Services
 Distributor and Agent
 FAQs
FAQs