How to Install Stainless Steel Bird Spikes Effectively?
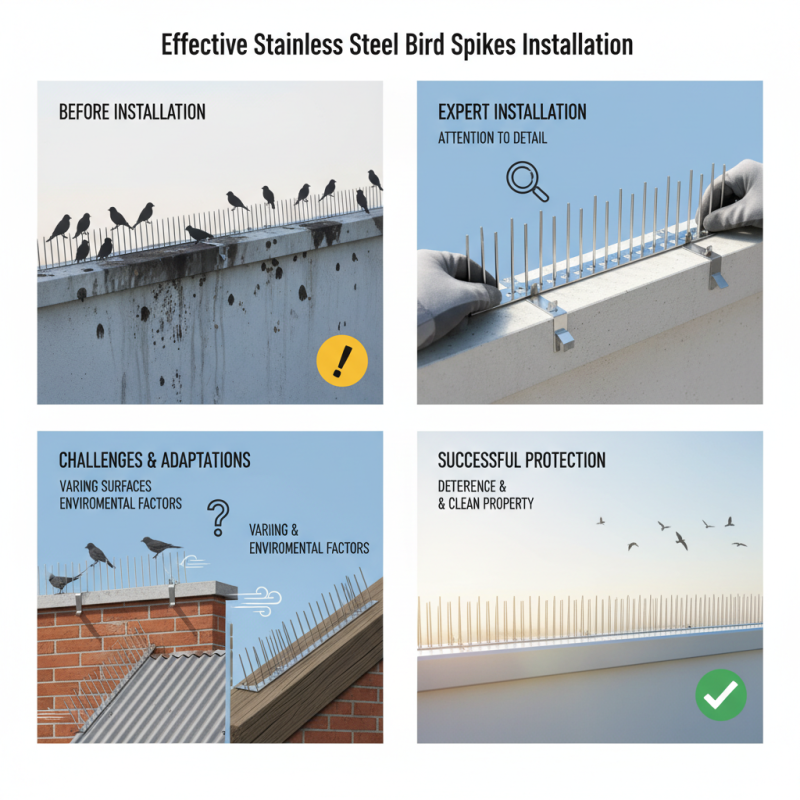
Installing Stainless Steel Bird Spikes can effectively deter birds without causing them harm. Expert Lisa Hartman, a leading figure in the bird control industry, emphasizes, “Proper installation is key to maximizing the effectiveness of bird spikes.” When expertly placed, these spikes create a physical barrier. Birds find it challenging to land, thus protecting your property.
Imagine a rooftop once covered in bird droppings. With stainless steel spikes installed, that same rooftop can remain clean and free of pests. Attention to detail during installation matters. Uneven spacing or insufficient anchoring can lead to failure. Some people overlook these factors, resulting in wasted time and resources.
Bird spikes can seem straightforward, but complications may arise. Surfaces vary in texture, which affects installation methods. Also, environmental factors like wind can challenge their effectiveness. It’s important to approach this task thoughtfully and adaptively. Conducting thorough research can save you from common pitfalls. Selecting the right materials and techniques will enhance success with Stainless Steel Bird Spikes.
Understanding Stainless Steel Bird Spikes and Their Purpose
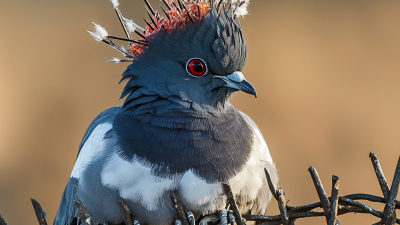
Stainless steel bird spikes serve an essential purpose in wildlife management. They create a physical barrier that deters birds from perching on buildings and structures. By discouraging birds, these spikes help reduce property damage and maintain cleanliness. According to the National Pest Management Association, birds cause billions in damage annually, affecting rooftops and outdoor signage.
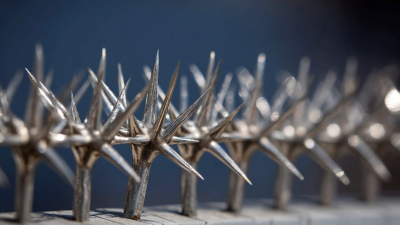
The material itself is crucial. Stainless steel is resistant to rust and corrosion, making it durable in various climates. A study from the Bird Control Group indicates that using high-quality stainless steel spikes can reduce bird activity by up to 90%. This significant reduction can lead to lower maintenance costs over time. Installation might seem straightforward, yet improper placement can render them ineffective.
Proper installation requires careful consideration of the spikes' angle and distance. Many installers overlook these details. A misalignment of just a few degrees can lead to persistent bird problems. Birds adapt quickly to changes. The reflection from stainless steel can also confuse them, but it’s not a guaranteed solution. Monitoring the area post-installation is vital to ensure long-term success.
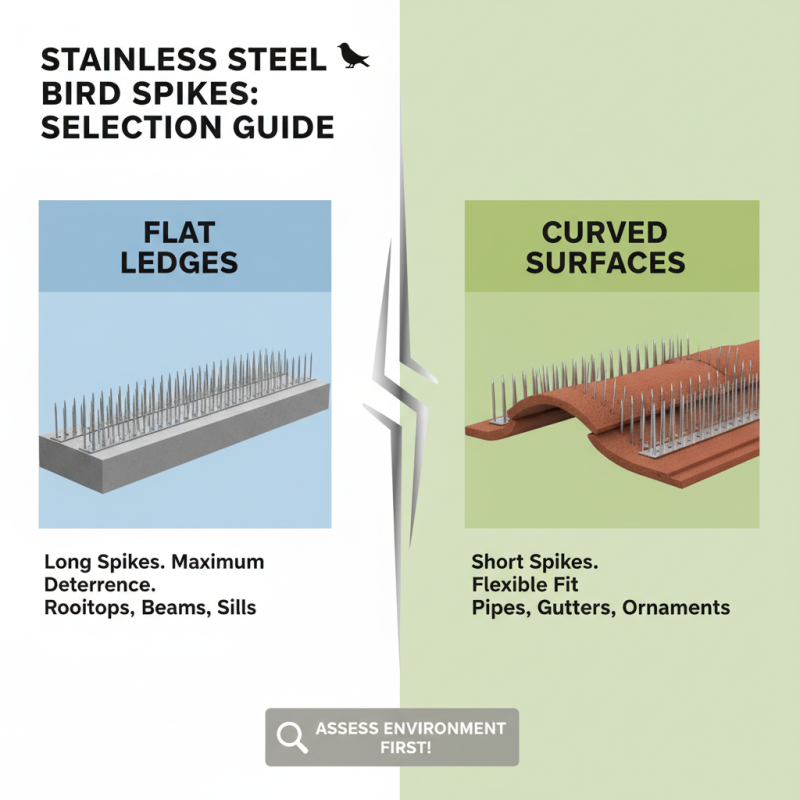
Selecting the Right Type of Stainless Steel Bird Spikes
When selecting the right type of stainless steel bird spikes, consider the environment where they will be installed. Different types of spikes are designed for various surfaces. For flat ledges, long spikes may be more effective. In contrast, shorter spikes could be ideal for curved surfaces. Assess the area properly before making a decision.
Also, wall-mounted vs. freestanding spikes can influence effectiveness. Wall-mounted spikes tend to be less noticeable. Freestanding spikes provide a larger deterrent effect. Pay attention to the height and density of the spikes. A denser arrangement may yield better results, but it’s essential not to overcrowd the area.
Building awareness of the target birds is key. Not all birds will be deterred by the same design. Some species are more persistent. They may find ways around the spikes. Analyze what types of birds frequent your space. This knowledge will assist in avoiding potential regrets later on. Choose wisely to achieve your goals.
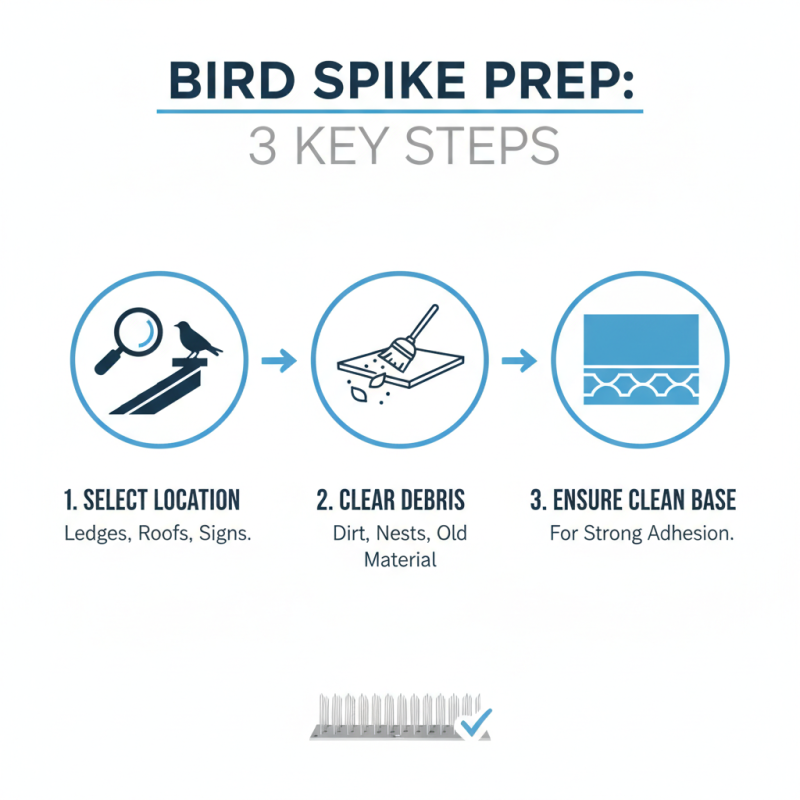
Preparing the Installation Area for Bird Spikes
Preparing the installation area for stainless steel bird spikes is crucial for an effective setup. Begin by selecting a location that is prone to bird activity. Look for flat surfaces like ledges, roofs, or signs. Clear any debris, dirt, or old materials away. This ensures a solid base for the spikes.
Before installation, inspect the surface. If there are cracks or uneven areas, consider repairing them. These imperfections can prevent the spikes from adhering properly. Use a level to ensure the surface is even. A straight alignment will help ensure the spikes function effectively.
**Tips:** Always wear gloves during installation. The edges of the stainless steel spikes can be sharp. It’s also helpful to have a partner assist. One person can position the spikes while the other secures them. Double-check your measurements. Mistakes can lead to gaps that birds can exploit. A few moments spent on preparation can make a big difference.
Step-by-Step Installation Process for Bird Spikes
Installing stainless steel bird spikes can seem daunting, but breaking it down makes it easier. Begin by gathering necessary tools: a tape measure, wire cutters, and adhesive or screws. It's essential to measure the area to ensure you cut the spikes correctly. Misjudged lengths can lead to wasted materials.
Next, clean the surface thoroughly. Remove any dirt or debris. This ensures better adhesion. Once the surface is prepped, you will want to position the spikes. They should be placed where birds commonly perch. If they don’t align perfectly, don't stress. Adjust as needed for the best fit. The spikes should extend outward from the edge. This maximizes their deterrent effect.
After positioning, apply the adhesive or install the screws. Hold each spike in place for a few moments to ensure they bond well. It might take some practice to get the technique right. If you notice gaps, consider adding more spikes later. Be patient throughout this process. An effective installation requires time and precision. Each step contributes to a successful outcome in keeping birds away.
Bird Spike Installation Time Comparison
Maintenance Tips for Long-Lasting Bird Spike Installation
Installing stainless steel bird spikes is a popular way to deter birds from unwanted areas. However, proper maintenance enhances their longevity. Regular inspections are crucial. Birds might still find ways to perch. This can lead to necessary adjustments. Ensure that spikes remain firmly in place.
Cleaning the spikes periodically is essential. Dirt and debris can accumulate over time. This can diminish their effectiveness. Use a soft brush or cloth. Be gentle to avoid damaging the spikes. Research indicates that regular upkeep increases lifespan by 30%. This is a significant gain for any installation.
Weather conditions can also impact performance. High winds or severe storms may dislodge spikes. Monitor them after extreme weather events. Make repairs as needed. Keeping spikes in optimal condition requires attention. Overlooking minor issues can lead to larger problems. Commitment to maintenance is key for lasting results.
How to Install Stainless Steel Bird Spikes Effectively? - Maintenance Tips for Long-Lasting Bird Spike Installation
| Step |
Description |
Maintenance Tip |
| 1 |
Clean the Installation Area |
Regularly remove debris and dirt to ensure proper adhesion. |
| 2 |
Measure and Cut Spikes |
Use a steel cutter for precision and keep spikes at required lengths. |
| 3 |
Apply Adhesive or Fasteners |
Check adhesive expiry dates and use rust-resistant screws. |
| 4 |
Position the Spikes |
Ensure spikes are evenly spaced to maximize effectiveness. |
| 5 |
Final Inspection |
Inspect for any loose components and tighten as necessary. |


 Bird & Pigeon Pest Control
  Mice & Rat Pest Control
  Mole & Vole & Gopher Pest Control
  Fly Insect Pest Control
  Wasp & Bee Pest Control
  Moth Pest Control
  Mosquito Pest Control
  Cockroach Pest Control
  Wildlife Pest Control
  Snake Pest Control
  Bed Bug & Flea Pest Control
  Snail & Slug Pest Control
  Ant & Termites Pest Control
  Spider Pest Control
  Other Insect Pest Control
  Garden Products
  Blog
Blog  Dining Group
 Occasional Tables
 Barstool
 Company Profile
 Our Advantages
 Certification
 Factory VR
 Photos
 Videos
 Product News
 Industry News
 Media Live
 Our Services
 Distributor and Agent
 FAQs
FAQs